Noctua NH-C12P Manuel d'utilisateur
Naviguer en ligne ou télécharger Manuel d'utilisateur pour Accessoires pour ordinateurs Noctua NH-C12P. Noctua NH-C12P User Manual Manuel d'utilisatio
- Page / 4
- Table des matières
- MARQUE LIVRES
Résumé du contenu
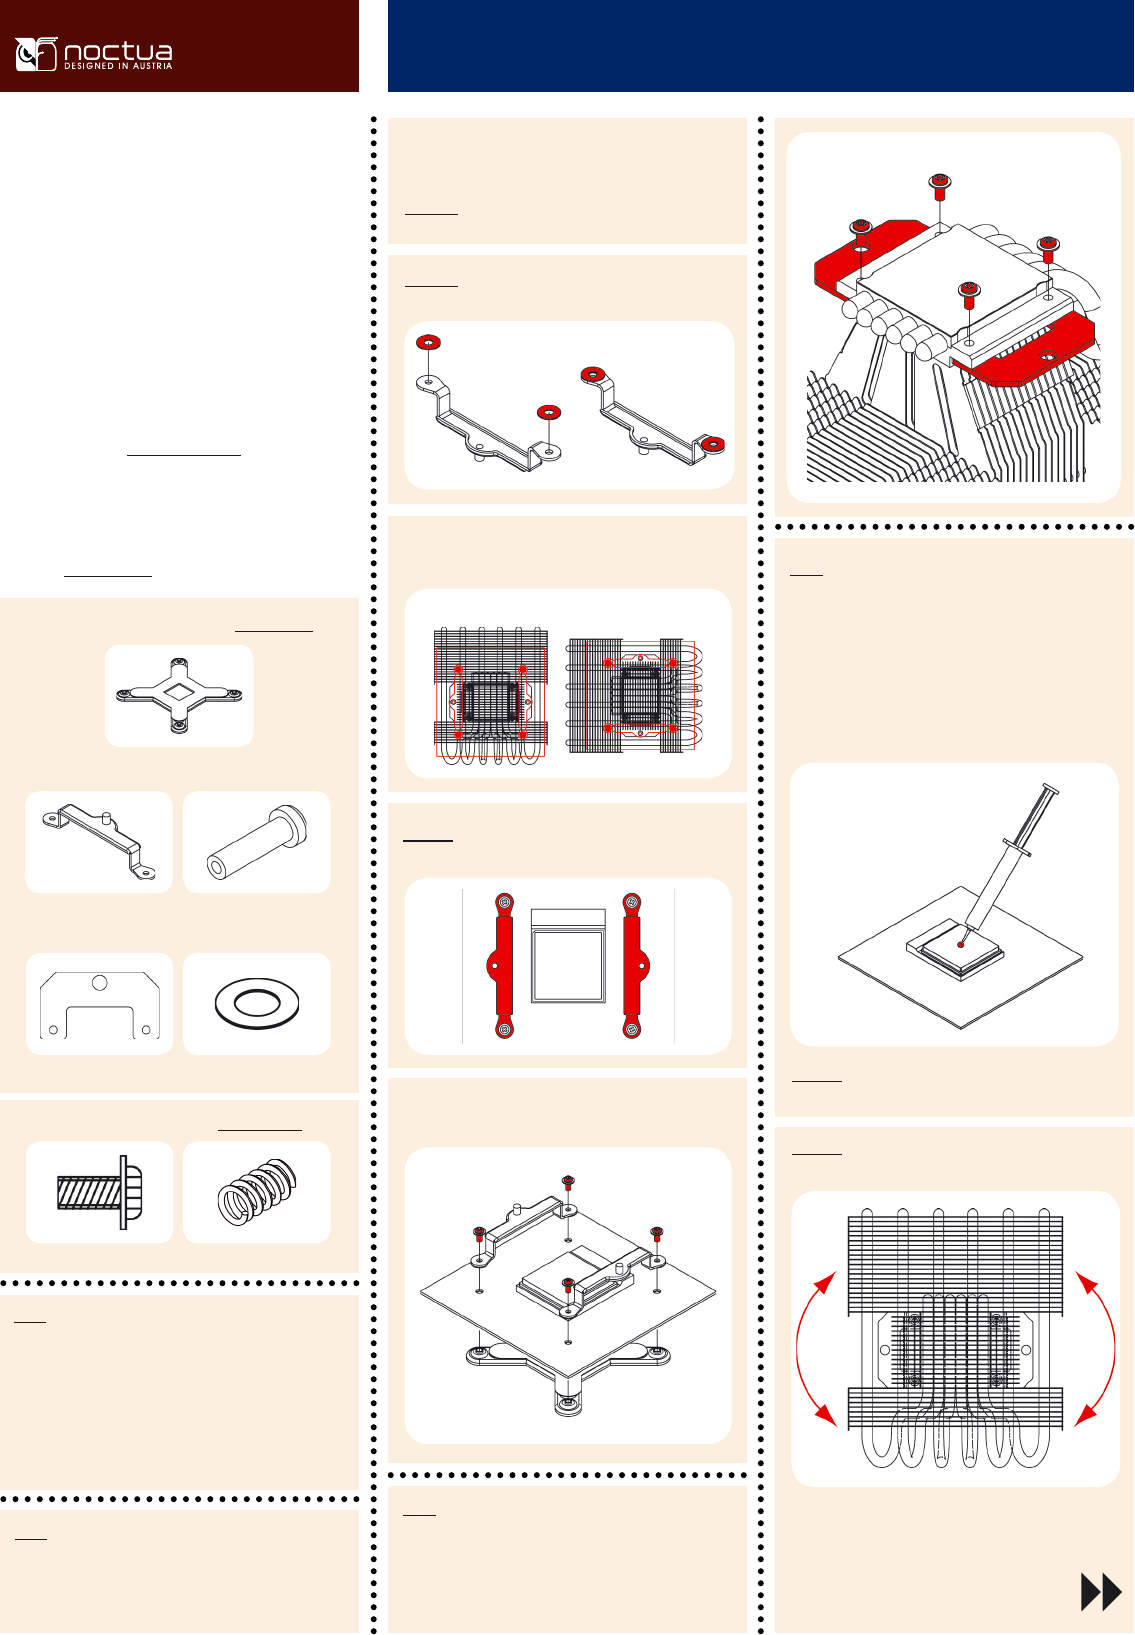
Thank you very much for choosing a Noctua cooler. This manual will guide you through the installation process step by step.Noctua LGA775 Mounting-Kit
NH-C12P-LGA775 | Installation ManualAttaching the fanStep 6:First stick the 2 anti-vibration strips onto the cooling fins in order to dampen minor vib
Thank you very much for choosing a Noctua cooler. This manual will guide you through the installation process step by step.Noctua AM2(+) Mounting-Kit
NH-C12P-AM2(+) | Installation ManualAttaching the fanStep 6:First stick the 2 anti-vibration strips onto the cooling fins in order to dampen minor vi
Plus de documents pour Accessoires pour ordinateurs Noctua NH-C12P


Produits connexes et manuels pour Accessoires pour ordinateurs Noctua NH-C12P
 (4 pages)
 (4 pages)
 (4 pages)
 (4 pages)
© 2020, manymanuals.fr. Tous droits réservés | 1.503 s |
 Manymanuals.com
 Manymanuals.de
 Manymanuals.fr
 Manymanuals.it
 Manymanuals.pl
 Manymanuals.cz
 Manymanuals.es
 Manymanuals-pt.com
Commentaires sur ces manuels